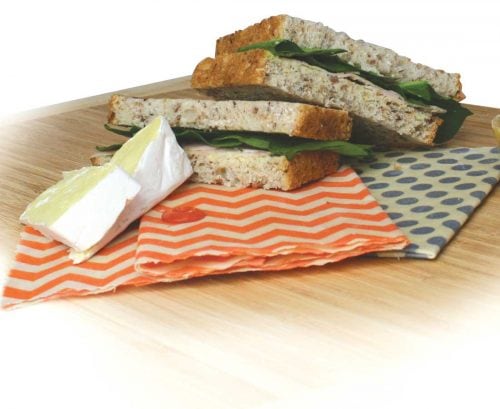
Reusable beeswax wraps are a great replacement for plastic clingfilm, and sell for big bucks in stores – yet they’re super-simple to make at home. Rebecca Roughan shows you how to make your own beeswax wraps, step by step.
One of the ways you can cut single-use plastic out of your life – and help keep it out of the ocean – is to replace clingfilm with waxed cloth in your kids’ lunch boxes, and in the pantry, fridge and freezer.
Made from natural beeswax and cotton, these wraps smell delicious and can be washed or wiped clean to be used again and again.
To mould them around food simply warm the cloth with your hands (or under a hot tap) to make it pliable, then fold; the cloth will then hold its shape as it cools.
With a few of these in the kitchen drawer you’ll soon be using less daily plastic. They also make an attractive and affordable gift. Why not try making a few this year as Christmas gifts for friends?
A word of warning though – you need to avoid washing them on a hot cycle in your dishwasher as the wax could melt and make a mess.
Likewise, they must not be used for meat as you can’t wash them hot enough to sterilise them without removing the wax.

You’ll need...
- Some 100 per cent cotton fabric — you can upcycle an old sheet or splurge and buy some pretty patterned fabric (choose ‘quilting fat quarters’, which are pre-cut pieces of fabric, or buy by the metre). Some craft or fabric shops even stock organic cotton
- Grater
- A paintbrush that will never paint again
- Pinking shears (or scissors)
- Beeswax (order online – you’ll only need a few hundred grams)
- Oven
- A roasting tray (covered in tinfoil to protect it from the wax)
- Pegs and a line for drying your wraps.

Step 1 Prepare your fabric
Wash your fabric with unscented eco-friendly laundry detergent, then cut into the sizes you want; larger pieces are more versatile, with a piece about the size of a tea towel wrapping most things. Using pinking shears (scissors with a zig-zag edge) will stop the edges fraying, but isn’t compulsory.
Step 2 Prepare the wax
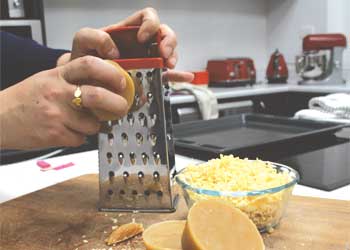
Preheat your oven to 180°C and cover your roasting dish with tinfoil. Grate a bowlful of beeswax as the oven heats.

Step 3 Wax on
Lay your fabric on the roasting dish and sprinkle it with beeswax. Don’t worry if you over-sprinkle, the next piece of fabric will soak up any excess.

Step 4 Melt the wax
Place the tray in the oven for five minutes or until the wax is melted, then remove.
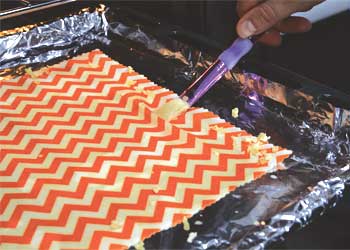
Use your paintbrush to spread the wax out to the edges and on to any dry bits. If you underestimated the amount of wax needed, sprinkle some more on and whip it back in the oven

Step 5 Dry the sheet
Hang the sheet out to dry for a few minutes – and your lovely beeswax-scented wrap is ready for use! Now make some more wraps by repeating the process until you run out of wax, fabric, or enthusiasm…
Tips
When your wraps start to look a bit tired, simply melt on more wax to make them good as new!
Wax can be messy, so use boiling water and detergent to remove any from your utensils – though you may find it hard to get the paintbrush clean again. Wax on clothes or carpet can be blotted up by pressing a hot iron on to a paper towel over the mark.
Extra for experts
Sew on a button and snip a button-hole to make a cute sandwich pouch.
www.healthyfood.com


